Wednesday, October 19, 2016

Work In Progress: Board Of Directors Meeting, Update 2

Work In Progress: Board of Directors Meeting (Pelicans), Update 2
            The last week has been a little rough for me. I’ve had some arthritis and back issues and, just recently, a bad cold and flu. They’ve kept me from accomplishing much work on the painting. I’ve been nursing myself, along with my wife’s incredible help, back because we’ve got reservations at a cabin in the mountains soon and we’re anxious to spend time enjoying the fall foliage, a pastime we find most relaxing. I’m also preparing for upcoming festivals and colored pencil and figurative drawing classes, and helping my granddaughter with an insightful science project, one involving the deleterious effects of climate change on marine shellfish. So, things are a bit hectic to say the least.

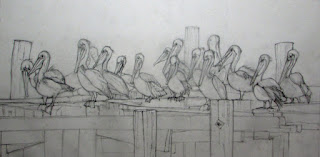
I have completed a pencil drawing of the Board of Directors Meeting and I present it here. I’m pleased with the way it’s come out so far. It is fairly straightforward, so I don’t think the value and color sketches will be a big departure from the original photo. What I have to make a decision on is the medium. At the moment I’m thinking, either all colored pencil, all pastel, or a combination of the two. Should have that decided soon. I’m anxious to get started.


Sunday, October 9, 2016

Work In Progress: Update 1, Board of Directors Meeting

Work In Progress: Update 1, Board of Directors Meeting (Pelicans)
            Recently, one of my students shared with me some very interesting photos she had taken while on a trip to Cedar Key, Florida. Although I had just finished a painting of pelicans, one photo in particular caught my interest and got me excited. It was a shot of a bunch of pelicans gathered on a dock. My impression was of a gathering of important members of an organization, standing around, conversing, just before being called to order. They were discussing informally matters that would be taken up formally in a few moments.    It might be a board of directors meeting.
            Well, anyway, the gathering of pelicans on a dock seemed like a wonderful subject for a painting.
            The original photo contained a longer expanse of pelicans, so I looked through it to see what section I liked the most. Once I picked out the grouping I wanted to include in the painting, I cropped it and saved it. The photos shown here is the original photo and the cropped portion I’m going to use for the painting.

            Next, I’ll discuss the preliminary composition.


Friday, September 30, 2016

Work In Progress: Pelicans, Update 3

Work in Progress: Pelicans, Update 3
            The Pelicans and Finishing Up

            More detail went into the Pelicans than anywhere else. They were the focus of the painting. I felt more confident doing detail work with pastel pencils, so, for the most part, I used the pencils on the birds, with only a little soft pastel.
            The heads and bills of the birds became my first focus. Pitt Pastels 113, 106, 184 and Carb Othello 685 and 620 were used, along with soft pastel Sennelier 342. The base color white for the head was PP 101 and then PP 199 and 175 were used for the darks of the pouch part of the bill that runs along the neck. For the top of the head, the yellows and gold were PP 106, 104 with 184 for the shadow areas. After completing the heads I worked on the bodies. They were mostly grays with darker values defining the feathers Here I used PP 101, 270, 175, 273 and 199. On the underside of the bodies I used some blue to indicate reflected color from the water.


            The eyes were defined with lights and darks so that the pupils would show up. This is one feature of pelicans that seems to be common to most of them. A light color ring around the eye sets off the dark pupil. The outer edge of the light colored ring is also dark. Surrounding the eye is a lighter area of brown.

            After completing the birds I went back to the water. Using a combination of the pencils and soft pastels, I refined the small waves and reflections from the birds on down to the bottom. Off to the sides of the painting I purposely left less detail. I also worked in the wakes behind the birds to give a feeling of motion


            As I mentioned in the last Update, I was unsure of some of the dark reflections in the water. I removed some and dumbed down others, while smoothing and softening the colors. Simplifying the waves and reflections helped to draw some attention away from the water and shift it more onto the birds.
           

            This painting is a fairly simple one. In this painting much of the detail is confined to the pelicans and the water adjacent to them. Further away, toward the top of the painting, and to the sides and bottom, detail diminishes, keeping attention directed on the birds. Originally I had more detail in the water, with a greater number of reflections. I think simplifying the water was the right move. That left the pelicans as the main focus. 

Tuesday, September 20, 2016

Work In Progress: Pelicans, Update 2

Work in Progress: Pelicans, Update 2
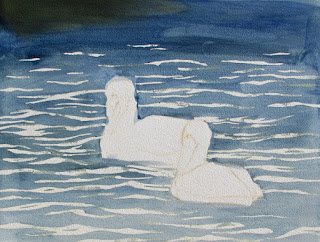
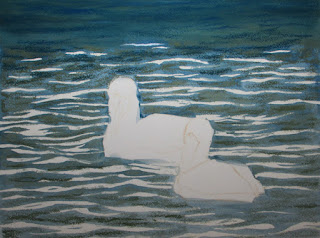
            I’ve decided to do an underpainting once again and I’ll be doing it with watercolor, so that’s why I chose an appropriate paper such as Arches watercolor paper. I also wanted to see how well the pastel takes to the paper – details, number of layers, etc. I was concerned about leaving the sky reflections light to white in color and still be able to be loose with the watercolors, so I decided to paint out the sky reflections with masking fluid first. Then, I could put in the underpainting without having to paint around the sky reflections.
            My first concern for the underpainting was to choose colors and an intensity that would agree with the value and color sketches I had prepared. I chose winsor Newton cobalt blue and terra verte for the underpainting colors. The picture area was wet down first and then the colors applied. I did a graded wash, keeping the top dark and grading to a lighter value toward the bottom. Because the underpainting would eventually be covered with pastel, I didn’t have to be particularly careful about the evenness of the graded wash, just that the values were close to what I decided in the preliminary stages. They would be eventually covered up to a great extent and any unevenness wouldn’t be evident.


            After the watercolor was dry and I had removed the masking material from the painting, I started back over the water with pastels. Again, I tried to stick with values that corresponded with those I set out in the value sketches and the watercolor underpainting. The upper part (further in the distance) was to remain the darkest and the values would become lighter toward the bottom (or the foreground). Keeping to a more neutral, or more reserved color palette for the water, I used olive greens and blues. The colors used were Sennellier 291, 213, 214, 395, 210, 216, 110, 525, 346, 503 and 466. Also Pitt Pastel colors 101, 168, 151, 174 and Carb Othello 440 and 435. Some in this palette were lighter colors but all were used in a manner that left the overall feeling subdued.


            After working my way down to the birds, I stepped back to assess the painting so far. The light sky reflections were too light, too bright. They were too distracting and I felt they would compete with the birds. So, I knocked them down a bit with blue. I also felt there were too many sky reflections, so I eliminated many of them and softened some edges. I also did some more blending, especially further away from the birds. I think that helped.  Still, I wasn’t sure about some of the darker reflections in the painting but I decided to wait until I had some of the birds recorded before I made more changes to the water.


            Now it was time, I felt, to work on the birds for a while, to integrate them into the surrounding water. I’ll discuss that during the next session.

Tuesday, September 13, 2016

Work In Progress: Pelicans, Update 1

Work in Progress: Pelicans, Update 1
            Pelicans are interesting birds. Their very distinctive beaks make them one of the most recognizable aquatic birds around. On recent trips to Tarpon Springs, Amelia Island and Canaveral National Seashore I found them to be one of the more ubiquitous birds on the water. They look so at home either gliding along the beach, just above the surf, or floating about in the harbor amongst boats. I managed to get some photos of them doing both. I liked the photo of a pair of brown pelicans casually paddling about Tarpon Springs harbor and felt the combination of the birds and the dancing colors and reflections on the surrounding water would make a nice painting. Its simple nature had a quieting effect on me and I wanted to convey that in the painting.


            This will be a pastel painting and, because I want to do an underpainting in watercolor, I’m going to do this painting on Arches 300 lb watercolor paper. The roughness of the paper should allow for a number of layers of pastel. The size I’ve decided on is 16” by 12” high – a horizontal format.
            The first task was to decide on a composition. I thought I might try three birds in the painting but after a few sketches I decided that two birds worked best. I liked the relationship of the two birds in the photo, one broadside and paddling right to left, and the other nearly facing away from me, paddling toward the first. This difference in poses added some interest.


            The multitude of reflections on the surface of the water seemed a bit too busy for me so I decided to reduce the complexity. I wanted some wave action but not quite as much as in the photo. This is to be a simple composition with only two elements – the birds and the water. Since the birds were the subject, I want them to be large enough to easily draw the viewer’s eye. The water would in a supporting role.
            The next task was to work up some value sketches. The birds, with their white necks and yellow coloring on their heads, would be the highest values and make them stand out. The water would be a middle tone. Rather than have this mid tone go all the way to the top of the painting, I felt grading the tone gradually from mid to dark would balance better. I think the dark above also helps to draw more attention to the pelicans. Although the darkness is there, it does not draw attention away from the birds.


            The last task in this preliminary stage is the color sketches. It is important that the values of the colors agree with the value sketch. As for color, the colors in the photos ranged from gray to blue. I wanted to steer away from gray, so I tried one sketch with blue. The color seemed to compete with the birds. In a second color sketch I added more greens into the mix and reduced the blue. The water became more neutral. I liked that better.

            With the compositional, value and color sketches done I am now ready to start the finished painting.

Monday, August 29, 2016

Work In Progress: Suwannee River, Update 7

Work In Progress: Suwanee River, Update 7

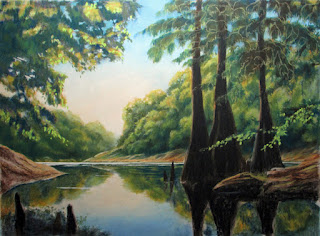
            The painting is complete!

            The important concept to remember with this painting is that I want to represent the scene in its basic, unembellished form – to represent the essence of the scene without detail. The less detail in the painting, the more the viewer is able to emotionally connect with it.
            The right side of the painting involves a grouping of bald cypress trees. Beyond this grouping is more of the background – the far bank and the trees above the water. The bald cypress trees with their foliage, in the foreground, is part of the scene but they are unimportant to the main focus – the confluence of the tree line with the river on the left side. I struggled with painting those trees – getting them in yet keeping them secondary to the center of interest. Each time I painted them I was dissatisfied with how they looked. I put some detail in to satisfy my innate drive for detail, but then realized they must remain without focus or they would compete with the center of interest. After a few cycles of detail and no – detail, I decided that the only real contribution the right side of the painting made was enlarging the painting.
So, I eliminated it. I simplified the painting even further. I decided to cut off the painting just to the right side of the second tree. I think that improved the composition – and eliminated the question of how to depict the bald cypress trees.
One change I made to help focus attention in the center of interest was the addition of some birds taking flight just above the river.


Just to see if I could further simplify the painting (without eliminating more detail) and still keep focus on the center of interest, I reduced the size of the painting further. I think the painting still works.


However, I think I’ll keep to the former size shown earlier.


            This exercise has been very instructive to me and I’ve learned a lot. I am very early in my re-evaluation and evolution in my painting style. I’m not sure where I will wind up. I still love detail but I am now convinced that it has to be judiciously applied. It will be interesting and exciting to see where this search will lead.

Friday, August 19, 2016

Work In Progress: Suwannee River, Update 6

Work In Progress: Suwanee River, Update 6
            Working through this pastel painting has been a great learning experience for me. My thoughts will most certainly evolve further as I gain more experience in this wonderful medium. When I first started this painting I was not convinced, but I was strongly in favor of the premise that landscapes, at least loose style landscapes could be completed with pastel pencils. I no longer think I can do that. If I want to do a loose landscape, a painterly landscape, not a highly detailed landscape painting, I think soft pastels, rather than pastel pencils, are the perfect tools to accomplish that. On the other hand, if I want to create more close focus studies such as portraits and wildlife, I think that I will choose pastel pencils. That may even change in time as my experience increases but at this point in my journey with pastels, painterly landscapes will be completed with soft pastels and portraits will be completed with pastel pencils. I’m just having an easier time doing this landscape with soft pastels.
            After the underpainting was completed I started back over the painting with soft pastels. I worked from dark to light and tried to keep to about the same values I established in the preliminary underpainting. I went from color to color, testing out a number of them as I progressed through the painting. Some seemed to work, others didn’t. Some looked good and others didn’t. Since it was easy to cover up colors that didn’t work, I could be more creative and spontaneous. That was a good feeling. If I completed a lot of work on an area and was not happy with it, I could scrub it off with a stiff brush and rework the area.
            The center of interest was established at the conjunction of the tree lines from the right and left, with the river. It was there that I suggested the most detail. As I moved further away from that area, detail decreased. It wasn’t easy for me, however, to loosen up as I moved away from the center of interest. I am too used to putting in detail. When I am working on an area out on the right side of the painting, where the cypress trees are, for instance, I’m focusing on that, and I tend to add detail. I continually stepped back from the painting, where detail was not apparent, to get a feel for the scene and a feel for how to depict that part of the scene. There were many instances where I had to remove detail, even low level detail, to maintain the effect I wanted. I had to continually evaluate the importance of an area to the overall statement I am trying to make – to the story I’m trying to tell.

            At this point I feel I’m nearing completion of this painting. I’ll continue to evaluate it, step back and squint to eliminate detail, look critically at all parts and see what should be included and what is unimportant. I’m looking for an impression, a feeling here, not merely a detailed inventory of what was there.

Monday, August 15, 2016

Work In Progress: Suwannee River, Update 5

Work In Progress: Suwanee River, Update 5
            As with most pastel landscape paintings I decided to do an underpainting.
But, just what is underpainting and why do we do it? This is a question I kept asking myself as I watched many fine pastel artists demonstrate. They all pretty much used the technique of underpainting and I couldn’t grasp the purpose. Sometimes I would see a big difference in the final painting and other times I was at a loss to see a big change. So, in my usual modus operandi, I did some research. If I was going to do an underpainting, I wanted to understand why doing so would make my paintings better. Many of you already know the reasons for underpainting, but for those who are unfamiliar with the technique or are still trying to grasp the reasons for doing an underpainting, read on.
            So, what is an underpainting, as it applies to pastel painting? Underpainting is applying a layer of color or gray-tone medium on a support or surface and then painting over it with pastel. The under painting can be almost any medium – pastel, watercolor, charcoal, acrylic, oil paint, gouache, ink, graphite. If it is a liquid or semi liquid medium, it is usually thinned. If it is solid, such as pastel, graphite or charcoal, it is usually applied lightly.
            What is the purpose of the underpainting? Sometimes it is used to develop the composition – to work out the shapes, masses and value relationships – to be sure that the structure of the painting is sound. We can also do this by producing value and notan sketches but establishing the structure on the full size painting works out any uncertainties that may not have been apparent in the value sketches.
            Other reasons for doing an underpainting are to develop the mood and feeling of the painting and to provide a foundation to try other creative techniques.
The mood for the painting can be established through choice of color for the underpainting.

            One important point to keep in mind is that, for the underpainting to work, it must be allowed to poke through the overpainting here and there. It is this combination, sitting in juxtaposition to one another that makes the painting work.

            There are two basic ways to do an underpainting. One involves just priming the support with one or more colors, and the other is to produce a very loose painting similar to the final. Priming generally covers the support with a uniform color, although combinations of colors can be used, limited only by the imagination of the artist.
            A very loose preliminary painting can also be undertaken as the underpainting. As I mentioned earlier, this method helps to work out compositional issues prior to the finished painting.
            Whether priming or loose painting, choice of colors for the underpainting has a marked effect on the finished product. Many artists like to use neutral beige or mid tone colors or earth tones for priming while others use complementary or analogous colors, or a combination of them. Complementary colors can add excitement to the painting, as they peer through the overpainting. Analogous colors build harmony as they add support to the overlying color. Intensity of the colors used also greatly affect the results. High intensity underpainting colors left to show through here and there add much excitement to the painting. Alternatively, low intensity underpainting colors can add balance and unity to vibrant paintings.
            Regardless of whether the underpainting is complementary or analogous, it is a good idea, when preparing the underpainting, to keep to the values established in the preliminary value sketches. Likewise, the overpainting should be the same values.  
            The underpainting can also be a monotone value painting done loosely or in great detail. Grisaille (pronounced greez-eye), used with transparent watercolors, is a fully finished value drawing done in shades of gray or other monotone color, over which transparent colors are glazed. Richard McKinley has used this technique many times by preparing an initial line drawing in pastel, including values, applying a clear gesso layer over the top to protect the drawing, then adding transparent watercolor and finally pastel on top. The pastel layer was done lightly in places to enhance and intensify the watercolor. Other choices for protecting the initial drawing are Art Spectrum Clear Pastel Primer and Golden Acrylic Ground for Pastel.
            Underpaintings can be composed of pastel, done dry or made wet, or can be composed of mixed media. Dry pastel can be rubbed into the paper by various means but doesn’t become permanent and can be altered by later applications of pastel over it. More permanent applications result from wetting the pastel with mineral sprits, turpenoid or water, either with a synthetic hair brush or spray bottle. The pastel dries into the support and pastel can be applied over it without affecting the underlying layer.
            Mixed media can also be used to produce the underpainting. As I mentioned at the top of this discussion watercolor, gouache and acrylic, gesso, ink, graphite and charcoal, and even thinned oil paints can be used. Even combinations of all these media are possible.

If you want more information, Jan Blencoe has a great discussion on Underpainting on her blog. I found her discussion and examples very informative and clear. The discussion can be found here:
thepoeticlandscape.com/2013/03/why-do-under-painting.html.

            The first step was to roughly sketch the drawing onto the pastel paper. I did this with an ochre pastel pencil. The pastel paper is Pastelmat. The size of the painting is 14 X 19 inches. I taped off the picture area to keep a clean edge.


            I chose to go a little conservative with the underpainting. I chose just a few colors to establish the darks and lights and help support the final overpainting. In order to add a bit of sparkle in the sunlit portions of the trees I used some orange yellows, both for the foliage and for the reflections. For the shadows I used dark blue. For the sky and the water reflections I used a light blue for the higher reaches of the sky and a lighter, creamy color for the horizon – where the sun, which is off to the left, was rising above the trees. The cypress trees, which are in shadow, are very dark, so I used a very dark brown and black.
            All these colors were done lightly with the side of the soft pastel stick. You’ll notice that the painting was also done very loosely. I just wanted to get the basic structures in place, in the approximate value I wanted (based on the value sketch). The good thing about the pastel is that it is opaque and I can refine and adjust as I progress.
            After applying the pastel, I went over it with a denatured alcohol and a synthetic bristle brush. Wetting it all down embeds the pastel into the paper and make the underpainting permanent. I could run my hand over the painting after it dried and no pastel would come off. Yet, there is still plenty of tooth on the paper to take the pastel.
            After the underpainting dried I started applying soft pastel to the surface, covering the previous layer but allowing it to show through in places. The photo shows the beginning stages of this work.


            I’ll now continue to add pastel over the underpainting to develop the true painting.

Sunday, August 7, 2016

Work In Progress: Suwannee River, Update 4

Work In Progress: Suwanee River, Update 4

The Color Sketch
            Pastels are very liberating!
I did a color sketch for the painting and, because I had a pretty good idea of what colors I wanted to use, (and I know that I can easily add to them and perhaps replace some with others as I progress) I produced only one color sketch.
Choice of colors, or more to the point, making new colors, doesn’t have to be planned out as carefully with pastels as with colored pencils. Pastels are nearly pure pigment, are opaque, and can be layered one on top of another, one color effectively replacing another color beneath it. That is difficult or impossible to do with colored pencil (unless special techniques are employed). Colored pencil color is translucent and layering one color on top of another results in an optical mixing of the two. There is an enormous selection of hues, tints and shades with pastels, so it is much easier to find the right color without having to mix it.
Although I want to use colors close to those in the actual scene, matching them identically is not critical. Getting the right value is most important, then getting a believable and pleasing color comes next. So, here is the color sketch for the painting.


I will be doing an underpainting to add variety and interest as well as help unify the painting. I’ll discuss that next time.

Tuesday, August 2, 2016

Work In Progress: Suwannee River, Update 3

Work In Progress: Suwanee River, Update 3

Last time I posed a number of questions to myself concerning this painting that I felt were important for me to answer. I’m hoping that, by answering them I can produce a better and more meaningful painting. So, here goes…


1.      What does this scene mean to me? What am I feeling that I want to convey to viewers?
This first question I posed to myself last time I answered then. I still feel the same, so I’ll go with that same answer again.

I’m standing in the shade, looking out into a warm, sunny morning on a peaceful, slow moving river. Overhead, the canopy of bald cypress and oaks, and a gentle breeze cools me. Beyond the shade, out in the open, the sun is still low in the sky, but it is warming the trees on the far bank of the river, resulting in a play of contrasting lights and darks.

2.      Should there be dramatic contrasts of lights and darks?
Dramatic lights and darks always make for an interesting painting. I’m standing in the shade of tree canopy, so the overhead limbs and the cypress trees on the right are dark and contrast with the sunlit trees out in the open.

3.      Should the trees be backlighted or should the sun be coming from the side?
The sun will be above the trees and to the left. That is the actual situation and I feel there is no reason for me to change it. Backlighting can be very effective and beautiful but I don’t want to change everything about this scene to make it something completely different.

4.      The color of the sky, as well as the reflection in the water is light near the
trees and darkens with height. The sky can be warmed with a very light peach in the lighter areas.
I’ve thought this one out and like the idea of the sun lower in the sky, causing the low sky to be lighter while the overhead sky will be darker blue. Adding a little peach to the sky will warm it a bit.

5.      A center of interest or focus? A lone bird or two in the distance? A kayaker?
I’m not sure yet what will be the center of interest. It will, however, be in the area near the water surface on the left side. The tree line on both sides of the river dips with distance and perspective, converging in the area of special interest. There is a very light horizontal line of sky reflection just below the river bank, so that will also help to direct interest to that area. I may enhance that reflection to strengthen the focal area. Whether I will add a specific focal point of interest, I haven’t decided yet.
6.      Time is late morning. The sun is still low in the sky and warming the tops of the trees on the far bank.
I discussed this some in #4. This will be morning, the sun is still low in the sky and the it is hitting the upper portions of the trees, giving them a warm glow.

7.      Clouds?
No clouds. I think they would just unnecessarily complicate the painting. They aren’t important to the messaqge.

8.      Keep the linear, horizontal line of white reflection from the sky. Maybe add a few minor streaks here and there below it. It makes a nice focus. It could also be used as an arrow leading the eye to a center of interest.
I’ve also discussed this earlier. The white reflection is a nice tool to use to direct attention.

9.      Where do I concentrate detail? What is important to convey the message and what only complicates and blurs the message? Thought needs to go into what is important to tell the story. What is necessary to support the message and what is not necessary? How much detail is necessary to convey my idea and when does it become distracting. I don’t want an abstraction but I also don’t want too much detail.
Detail will be concentrated around the center of interest. Detail will decrease away from the center of interest.

10.  The converging diagonals of the tree line, the white reflection and the upward pointing cypress knees help to present the center of interest.
Again, already discussed. They are strong tools to help direct attention.

11.  Use an underpainting of warm colors to emphasize the warmth of the light and to make the greens more interesting.
I will be doing an underpainting to introduce warm colors in sunlit areas and dark, cool colors in the shadows.  These colors will be fixed to the paper by using an alcohol wash. Over the top of the underpainting colors I’ll use the colors seen in the photo reference. Hopefully, the underpainting will help to add interest and support for the final colors.

12.  Do I add complementary colors to the underpainting?
I’m not going to do too much with complementary colors for an underpainting. Use cool blues in the shadows. Where the shadows become lighter as they approach the sunlit areas I will add warmer blues (purples) to the mix.

13.  Add mid tone purples to the sky as an undertone?
Will probably not add purples or violets to the sky. This painting is not all about the sky, so I’ll keep the sky simple.

            With these thoughts and guidelines in mind, I’ll start on the painting. If I haven’t already mentioned it, I’m going to do this one in pastel. Size is 14 X 19 inches on Pastelmat. The underpainting will be done with soft pastels and the finish painting primarily with pastel pencil. I’m wondering how well suited the pastel pencils will be to doing the landscape painting. Will I eventually switch over to soft pastels? This will be one test.


Saturday, July 23, 2016

Work In Progress: Suwannee River, Update 2

Work In Progress: Suwanee River, Update 2
            If we are just going to copy a photo or scene our task is simplified to a great degree. But many times the photo of the scene doesn’t do justice to what lies before us. Not only is there a vista that the eyes can take in but there is a feeling, an emotion that is elicited from the experience. The mind’s eye may amplify certain aspects of the scene that support a feeling elicited, or ignore other aspects that interfere with that feeling. Our mind’s eye idealizes the scene before us – romanticizes it. We can visualize other things in the scene or consciously alter aspects, such as time of day or year, or the placement of the sun that can heighten the feeling. As we gaze upon the landscape we make judgments about what is important and what is not in conveying the feeling and emotions. It should be our undertaking as artists to portray the scene before us not as it actually appears in its infinite detail, but as it affects us emotionally - to simplify it, to emphasize those parts that are important to the message.
That’s not an easy task – for me. I’ve been focused over the past seven years on painting scenes just as I see them. I started off by reproducing scenes as I saw them – with all their detail. Then I learned to improve the compositions by adding and removing, moving things around, creating focal points and centers of interest, but I still retained a great amount of detail. I thought attention to detail would improve my paintings. The more I read and the more I watched other great artists, the more I began to question that idea. Increasing detail in my paintings didn’t result in increasing satisfaction or a feeling of improvement. I began to realize that increasing detail wasn’t the answer. Rather, it was reducing detail, simplifying, and rather than portraying what I see, portraying what I feel.
I have come to equate time spent to complete a painting with quality. The more time spent (mostly on detailed drawing), the better the quality. Not true! The time that should be spent on the painting shouldn’t be on attention to detail but in what needs to be included to convey the idea and emotion I feel being enveloped by a scene and it’s affect on me. It is emotion that is important, not accuracy.
Now, for some thoughts on how to portray this landscape scene along the Suannee River.
1.      What does this scene mean to me? What am I feeling that I want to convey to viewers?
I’m standing in the shade, looking out into a warm, sunny morning on a peaceful, slow moving river. Overhead, the canopy of bald cypress and oaks, and a gentle breeze cools me. Beyond the shade, out in the open, the sun is still low in the sky, but it is warming the trees on the far bank of the river, resulting in a play of contrasting lights and darks.

2.      Should there be dramatic contrasts of lights and darks?
3.      Should the trees be backlighted or should the sun be coming from the side?
4.      The color of the sky, as well as the reflection in the water is light near the trees and darkens with height. The sky can be warmed with a very light peach in the lighter areas.
5.      A center of interest or focus? A lone bird or two in the distance? A kayaker?
6.      Time is late morning. The sun is still low in the sky and warming the tops of the trees on the far bank.
7.      Clouds?
8.      Keep the linear, horizontal line of white reflection from the sky. Maybe add a few minor streaks here and there below it. It makes a nice focus. It could also be used as an arrow leading the eye to a center of interest.
9.      Where do I concentrate detail? What is important to convey the message and what only complicates and blurs the message? Thought needs to go into what is important to tell the story. What is necessary to support the message and what is not necessary? How much detail is necessary to convey my idea and when does it become distracting. I don’t want an abstraction but I also don’t want too much detail.
10.  The converging diagonals of the tree line, the white reflection and the upward pointing cypress knees help to present the center of interest.
11.  Use an underpainting of warm colors to emphasize the warmth of the light and to make the greens more interesting.
12.  Do I add complementary colors to the underpainting?
13.  Use cool blues in the shadows. Where the shadows become lighter as they approach the sunlit areas should I add warmer blues (purples) to the mix?
14.  Add mid tone purples to the sky as an undertone?


Now, I’ll work up some color sketches based on these thoughts and see what I can come up with. 

Tuesday, July 19, 2016

Work In Progress: Suwannee River, Update 1

Last September my wife and I, looking to get away from the house for a few hours, after the loss of our dear, long time companion, Peaches, took a drive up to Suwanee River State Park. The park is located in northwest Florida, in the Big Bend Area, in Hamilton County. The park is associated with a lot of Florida’s history. Andrew Jackson led troops through the area in 1818 looking for Indian strongholds. In 1863 Confederate forces constructed earthworks along the river to protect a railroad bridge near what was once the town of Columbus to guard against Union troops marching from Jacksonville. The Confederate army prevailed during that encounter, turning back Union soldiers in the Battle of Olustee in 1864. Columbus is gone now but a cemetery still remains nearby.
            My wife and I walked along the banks of the river and picnicked there in the early afternoon. I found some good vantage points to take pictures. Those pictures have been stored away on my computer since then, but I recently looked back through them and found a few promising shots. One stood out. It was a view of the river, past some baldcypress trees, their bases swollen from a long association with the water of the river bank. It is a peaceful scene, looking out from the shadows of overhead tree canopy into the sunlit river as it slowly meanders out to the Gulf of Mexico. I think it will make a good painting.


            My first step was to work out some value sketches and see if I could improve the composition a bit. The darks of the bald cypress trees, the foliage mass in the upper left and the cypress knees at the bottom formed a natural frame for a center of interest in the area to the left of the cypress trees - the light area of the sky and its reflection in the river. The lights of the sky and water, plus the mid tones of the background trees seemed to balance the darks nicely.
Although I liked the idea of the bald cypress trees, I wasn’t happy with the amount of space between the two trees. I felt the trees needed to be closer together or one needed to be eliminated – or more trees needed to be added. Also, some changes needed to be made to the cypress knees at the bottom. The rightmost cypress knee in particular seemed out of place and demanded too much attention.
            In my first value sketch (Sketch 1) I eliminated one of the bald cypress trees. That seemed to help some, but it still left me a little dissatisfied.  I also removed the cypress knee furthest to the right at the bottom. That helped also.


Then, something else struck me. The picture seemed divided nearly in half by the horizontal line of the river bank. My feeling was that the river bank had to be moved either up or down.
            I then tried another, similar composition (Sketch 2) but raised the river bank up higher, to almost two thirds of the way up. I also added two cypress trees back in to the composition, and grouped them closer together, but with unequal distances between them. Having a grouping of trees increased the mass of darks on the right, and I felt it looked better than having just one tree. Having only one tree seemed distracting to me. The larger dark mass felt better. The higher river bank also seemed to be an improvement.


            I did a third sketch, this time moving the line of the river bank downward to about a third of the way from the bottom. I liked that also. The question now was - river bank higher or lower?  At this point I’m leaning toward the higher river bank but I’m going to have to think on it.


            A last consideration in the composition is adding a focal point or center of interest. I need to add something to draw the eye to. Kayak or birds – or something else? In addition to these questions, there are other considerations that will affect how this painting looks in the end. I’ll discuss them in the next installment. 

Saturday, July 9, 2016

Work In Progress: Hydrangea, Update 6

Work In Progress: Hydrangea Update 6
            Final Touches
            Here is the completed painting. I completed the background on the left side. Also added some violet to some of the petals. PP 138 was used. This pastel was a little intense, so I had to use a very light touch and blend it in with white or a light blue to keep the color subtle.
            I think I accomplished what I set out to with this painting. I wanted to use detail selectively and make use of edges to focus attention on the center of interest. The center of interest, the focal point, was in the area of the lower mass of flowers. Most of the detail was centered there. Detail decreased outward from that focal point. The flower masses across the top were the least important and contained the least detail. Secondary areas of interest were to the upper left and upper right of the main center. Together they formed a roughly triangular area. The leaves surrounding the center of interest also have less detail. When completed, they, at first, competed with the flowers for attention. However, after adding in the diffuse, soft, out of focus, background I believe their importance diminished some. The dark shadows surrounding the lower flower mass also helped to focus attention on the flowers. The leaves almost provide a partial frame for the flowers.
            I tried to include some lost edges in this composition also. They are evident mostly in the handling of the leaves – edges are lost in the shadows. I also lost some edges of flowers on the far outside left and right, and also here and there within the floral mass itself.


            I really like pastel and, moving forward, I think pastel will become an important medium for me. 

Saturday, July 2, 2016

Work In Progress: Hydrangea, Update 5

Work In Progress: Hydrangea Update 5
            Refining the Shapes
            In this pass I brought more clarity to the shapes, making them look more three dimensional. First, I went back over the flowers. I concentrated detail in the lower mass of flowers. Moving away from this center of interest, I gradually decreased the detail until, in the outer masses at the top and to the right, detail was the least. There was also the least amount of variety in tone and contrast on the perimeter. Most of the tonal range  and contrast is centered in the bottom mass of flowers. The blues used in the center of interest were CO 390 prussian blue, CO 405 ultramarine blue, CO 450 cyan blue, CO 440 sky blue, CO 435 ultramarine blue light, PP 143 cobalt blue and PP 140 light ultramarine. The darker colors were used more in the center of interest. I used some CO 100 titanium white for the flower centers, some highlights on petal edges and near the centers of the flowers.
            The leaves came next. I had initially blocked them in but did little additional work on them. The deepest shadows were a mix of CO 390 prussian blue and PP 174 chrome green opaque. The lighter areas were a mix of PP 174 and PP 168 earth green yellowish. In the sunlit portions of the leaves I added CO 106 light chrome yellow. After initially filling in the area of the leaf, I used PP 106 to draw in the veins, then I added texture to the leaves with a combination of the three Pitt Pastels.
            I decided to add some background to the mass of flowers, but wanted to keep it diffuse. Here I used CO 440 sky blue, CO 450 cyan blue, CO 435 ultramarine blue light, PP168 earth green yellowish and PP174 chrome green opaque. I stroked in the colors and smudged them with my finger. Adding the background also had the effect of diminishing the importance of the leaves. I felt they were beginning to compete with the flowers for attention. Now they seemed to blend more into the background, especially in areas where I purposely lost some edges.


            Next, I’ll complete the background and add the final touches to the painting.

Sunday, June 26, 2016

Work In Progress: Hydrangea Update 4
            Developing the Shapes
            In the last Update I described blocking in the shapes – darks, midtones and lights – without too much regard to any definition. It’s beneficial to see the big picture first, then gradually work toward greater definition. In this second pass I worked from darks to middle tones to lights again, but this time I began to develop the focal point to a greater degree. The same colors are used at this stage as in the previous. Color becomes more solid as more of the paper is covered. Shapes include the positive shapes of the flowers as well as the shadow shapes. The focus will be in the area of the lower floral mass. Here is where most of the detail will be concentrated. Moving further away from this center of interest, detail decreases.

            Forms still appear more or less flat in this pass, as the subtle form shadows have not been added yet. That will come in the refinement stage.


Saturday, June 18, 2016

Work In Progress: Hydrangea, Update 3

Work In Progress: Hydrangea, Update 3
            As in the last two paintings, completion of this painting will be done in a number of stages. The first three stages have already been accomplished – developing the composition, the tonal study and the color study. After transferring the drawing to the finish paper, the final four stages will be carried out to complete the painting. Those four stages are blocking in the shapes, developing the shapes, refining the shapes and final touches.
            You’ll notice I describe progressing through the painting in terms of shapes - that’s what I have to keep in mind. Although this a floral painting – a painting of Hydrangea flowers, it is ultimately a painting of shapes - the arrangement of shapes of varying tones into a pleasing composition. For me, at least, it’s not always easy determining whether I have the best arrangement or a universally pleasing arrangement of shapes. I think it’s very subjective. What I’m comfortable with may not make you comfortable. But, that’s all we have. We put together shapes in varying configurations and of differing tonality according to generally accepted beliefs and choose the one that we feel best about – and hope that most others feel the same way. It’s a very personal journey.
            Many pastel artists work their paintings from dark to mid tone to light, and that’s the way I worked this one. Working in this fashion can develop the three dimensionality of a shape – the mid tones are always in between the lights and darks, giving solidity to a form. However, another way of tackling a painting is to place the darks first, then the lights, then the mid tones. Establishing the two ends first allows you to develop the mid tones as needed to fit in. This way makes a lot of sense to me and I may try that in my next painting.
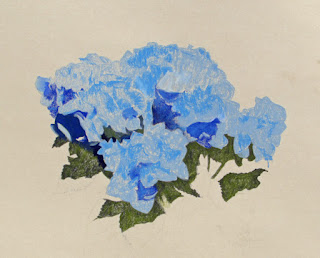
            In this painting I placed in the darks first. For the first pass, or blocking in stage the shadow areas within the flowers established with CO 390. For the shadows with in the foliage I used a combination of CO 390 and PP 168. These colors seemed pretty close to what I observed when looking at Hydrangea flowers outside in my own garden. During this first pass I’m not using the darkest darks or lightest lights so that I can go darker or lighter if necessary to expand the range of tones. The dark blues somewhat frame the lighter shapes of the flowers.

            The midtones came next . Here I used CO 440, 450 and PP 140 for the flowers and PP168 for
the leaves.

            All the lighter areas of the flowers were layed in with CO 435. I didn’t go any lighter on the leaves at this point.

            It wasn’t always easy but I tried to think in terms of large shapes when blocking in at this stage. Standing back away from the reference photos to eliminate details helped. I also squinted. At this stage I’m only interested in the most basic shapes and their tone in relation to one another. I had a tendency to start placing details, that’s why I had to consciously think only in terms large shapes, including only landmarks here and there to make it easier later to find things.


            The next pass through will be development of the shapes. 

Monday, June 13, 2016

Work In Progress: Hydrangea, Update 2

Work In Progress: Hydrangea Update 2
            From the thumbnail value and color sketches I developed the full size pencil drawing. After doing so, I went back to the sketch made from the combined photos and made some notes. The notes were my first thoughts and may or may not be fully followed as I go forward, but they’ll serve as a guide. The main focus will be on the lower flower mass. This is the area where the most detail will be concentrated. It is here that some of the sharpest edges and greatest contrasts will be found. I’ve constructed the composition so that the entrance point for the viewer’s eye will be on the branch at the bottom - not clearly visible on the sketch with the notes but easily seen on the full size drawing. The branch leads directly to the center of interest – the lower mass of flowers. The eye will then pass up and around the rest of the floral masses. The dark shadows of the flowers and foliage mass tend to frame the lighter floral masses. As the eye progress upward from the focus area it will encounter progressively less detailed floral masses, the lightest and least detailed are those three masses across the top.


            The full size drawing is not intended to be a fully detailed drawing but merely a guide to the floral masses. I indicated some landmarks – flowers and flower centers - to help me fill in the other features as I start the color work.


            The painting will be 11” by 14” long and done in pastel pencil. The paper I chose was UArt sanded pastel paper, 500 grade. I like the sanded papers. I like the feel of the pastel going on and the fact that they can take a lot of pastel before they fill up.
           

            Next, transfer the drawing and start the color process.

Thursday, June 9, 2016

I’m pleased to announce that one of my colored pencil paintings, “Osprey: Lovers Key, Florida” has been published and included in Ann Kullberg’s CP Treasures IV. I feel honored to be included in the company of some of the best colored pencil artists in the world. This is the second time a painting of mine has been included in CP Treasures. My painting of “Raine and Megan” was included in CP Treasures III.

            CP Treasures IV contains the creations of 120 colored pencil artists, picked from 827 submissions. It is just out and can be purchase online at Ann Kullberg’s website by going to http//annkullberg.com/products/cp-treasures-volume-iv. If you are a colored pencil enthusiast and want inspiration, this book is a must have. I’ve seen the works that have been included and I found much to inspire me.


Saturday, June 4, 2016

Work In Progress: Hydrangea, Update 1
            One of my favorite shrubs is the Hydrangea. They are simply gorgeous from late spring through early summer and provide color here in Florida right after the Azaleas finish blooming. They, along with Camellias and Azaleas, provide for a long season of color in the deep south that starts in late September or early October, and doesn’t end until late June or early July. Hydrangeas were a mainstay in the gardens of the estate where I worked for thirty years and they still are in my home garden. My wife and I see them wherever we travel in the south. Hydrangea colors range from white to blue to pink and near red, and it’s possible to find a mix of blue and pink flowers on the same plant – and even a color we call “blurple” – a mix of blue and red in various degrees.
            My next project, needless to say, is a Hydrangea. Although we have quite a few growing in our gardens, I found inspiration in two potted plants we had on display. Although both were hot pink, I decided, for the painting, to change the color to blue.


            I took a number of photos of each plant from different vantage points and drew a rough sketch of the view I thought best.  When I completed the sketch I was unimpressed with the arrangement of light and dark masses. It was too static. As I looked through the images again, I was unable to find one that I really liked. The shapes of the floral masses weren’t interesting. They all presented a horizontally oriented grouping of light toned floral masses atop a dark mass of leaves. However, as I looked through the different images again, I was struck by two views that, when combined, presented an inverted “U”. If I combined the images, one of the arms of the “U” covered much of the dark foliage and, for me, the arrangement looked immediately better.
I decided to stick with this new arrangement and began to use it as a basis for a number of tonal studies. I wasn’t sure if I wanted to do a vignette or a full, border to border painting. After each tonal study I did a quick color study to see how the colors and masses fit together. 

All together, I did twelve tonal studies and seven color studies. There were too many to upload here but I did post them all to my website if you are interested. Below are the original photos and the studies I decided on.


After looking at all the tonal and color studies I was attracted to two of them – tonal study 3 (color study 2) and tonal study 7 (color study 7). The former was clean and simple, more botanical, while the latter was more complex and floral (if you can feel the difference). In the end I decided I would do a vignette, corresponding to tonal study 3 and color study 2 because I wanted to keep it more as a botanical painting. The background would be clean.
To be sure of my choice I did a quick but a bit more detailed pencil study of tonal study 3. I liked the composition and shapes and felt it would make a good painting.
Color study 7, with the dark background extending into and filling the upper right corner is also a promising composition and I may do that one at some future date.


I’ll start on the full size pencil drawing next.

Wednesday, June 1, 2016

Gallery Representation

Gallery Representation – a great opportunity requires some changes.
            I’ve had to make some unexpected changes with regard to my art projects and the changes require that I postpone the Ruby Beach project. I recently made arrangements to display many of my paintings at a local gallery – a great arrangement – but continuing to display my work there means I will have to do more paintings depicting regional scenes or paintings with more general appeal, such a botanical or floral.
            The gallery which will be displaying my work is Florida Artists Gallery, located at 8219 Orange Avenue, Floral City, just a block west of the traffic light in this small but quaint, historic city on the west coast of Florida in Citrus County. Floral City is but a stones throw from the big metropolises of Tampa and Orlando, and attracts many art lovers from those cities. The gallery houses the works of many very talented local artists who work in oils, watercolor, pastel, graphite and acrylic and is well worth a visit. There is even a cafĂ© in the building, allowing you to dine at the same time. You can find more information about the gallery at flartistsgallery.com.
            There are a great many areas of Florida, both natural and historic, that provide innumerable ideas for great paintings – the marshes of the northwest coast and St John’s River in the east, the Withlacoochee River (from which I received inspiration for Withlacoochee Flight”, the lakes and rivers of the central region, the beaches of the east and west coasts and the great expanses of the Everglades on the southern tip of the state. I’ll be looking at many of these areas for more inspiration.

            So, I’ll be suspending the work on Ruby Beach (I’ll return to this painting in the future) but check back in the next few days for an update on a new painting – a floral.